
TIMEA HELP
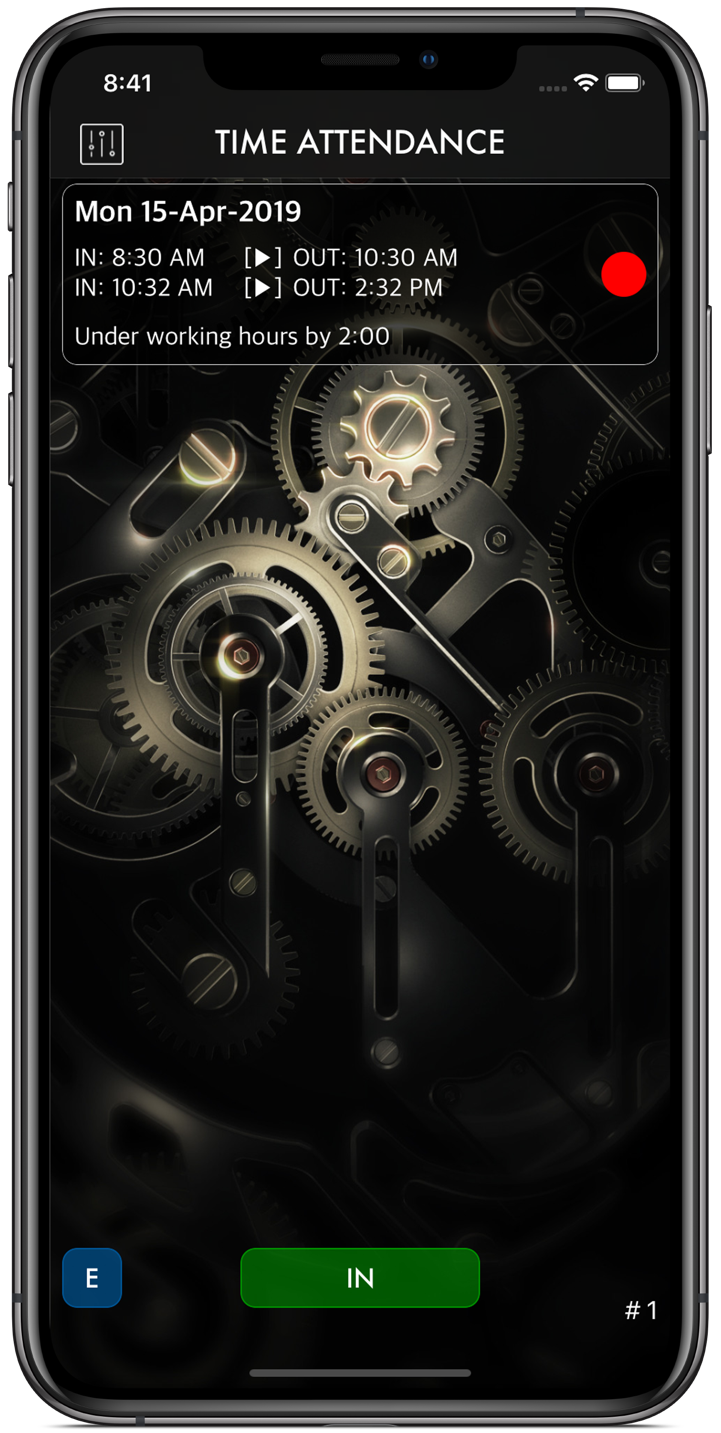
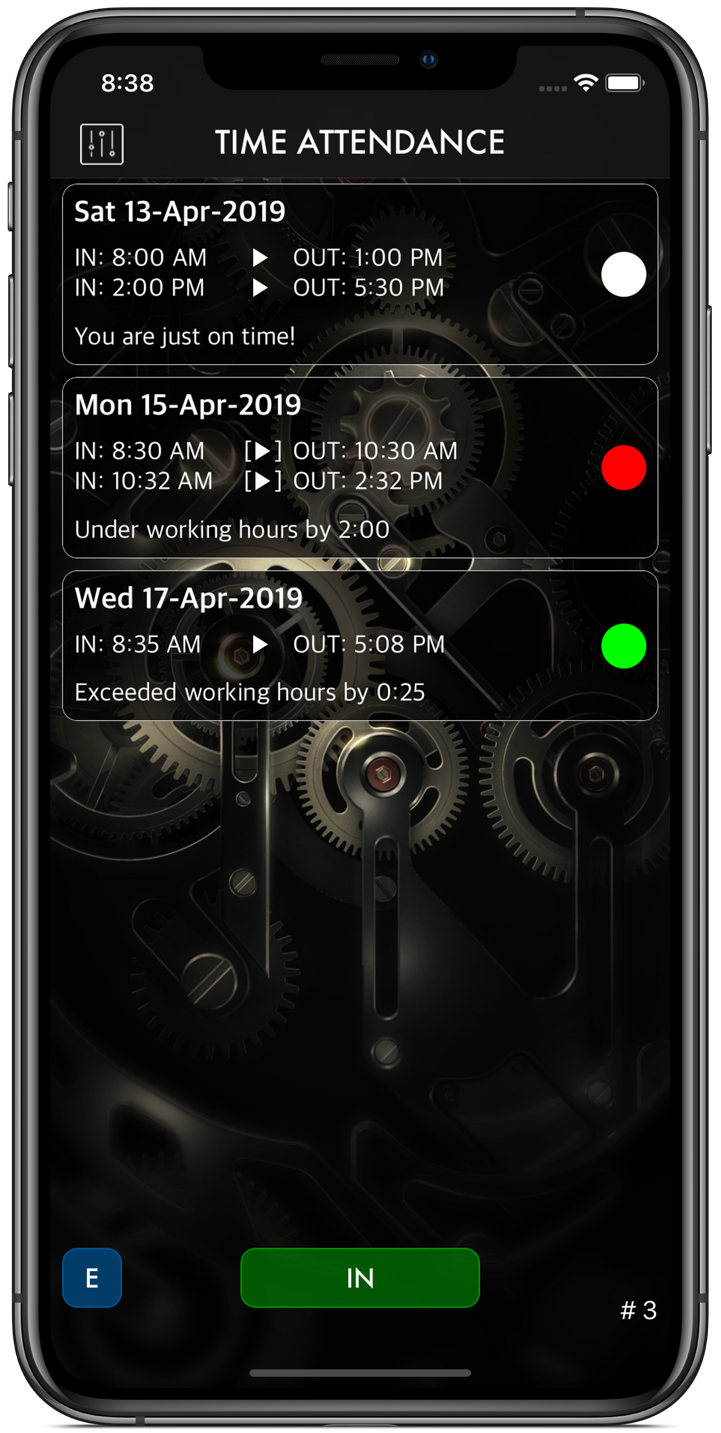
On the main page you will see all records & the working hour status & notes, in addition to a color indicator to show if you are late (in red), on time (in white) or overtime (in Green)
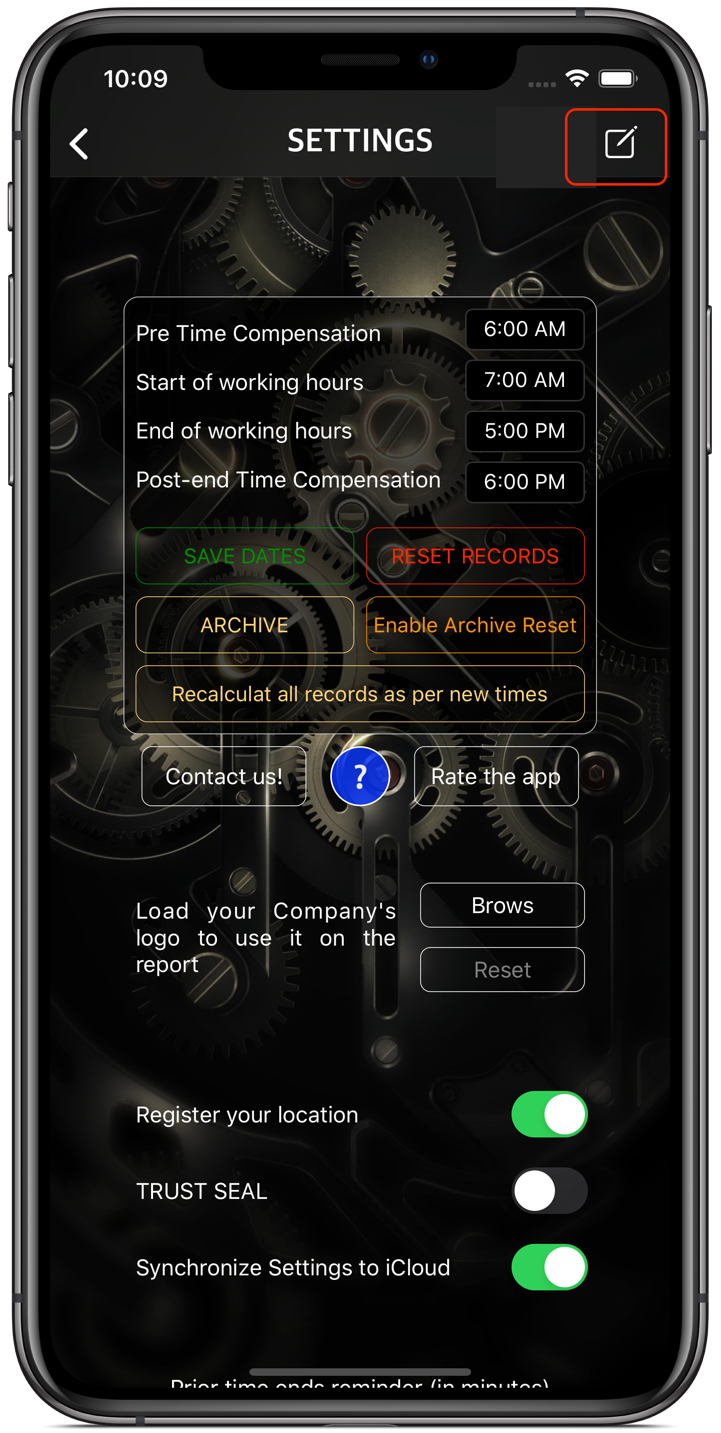
In the top left of the page, you can see the settings button where you can add & change working hours, company logo, allow for location services & the TRUST mode.
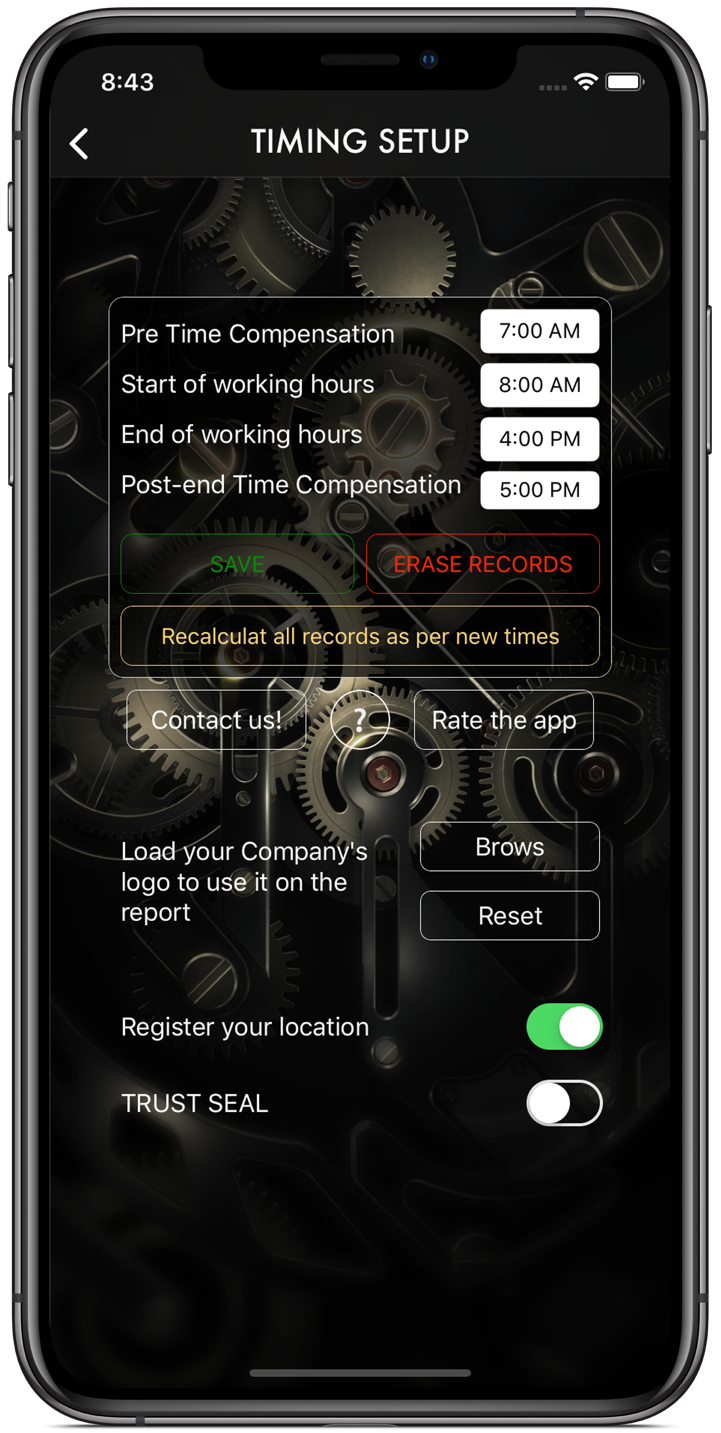
You can set the working hours as follows:
Pre Time and post time compensation. If the employer counts the time before the official working hours and/or after the official working hours, then you have to add them here:
i.e. if your working hours are between 8:00 AM & 4:00 PM and the employer allows for an hour before and after, then it will be registered as follows:
Pre-time: 7:00 AM
Start-time: 8:00 AM
End-time: 4:00 PM
Post-end time: 5:00 PM
Or if the Entity does not have a compensation time then the pre and post times will be as same as start and end times, and will be registered as follows:
Pre time: 8:00AM
Start time: 8:00AM
End time: 4:00PM
Post-end time: 4:00PM
If you have changed the working hours at any time, the previously registered records will remain as they where registered "following the old work hours".
If you would like all the records to follow the new "updated" working hours, then you have to press the (Recalculate all records as per new times) button to recalculate all records as per the new working hours.

After setting up the working hours, you can go back to the main page and add a record, by pressing on the (IN) button.
then you will be taken to the next page where you might press (SAVE) to save the current time or to change the date picker to the desired date and time then save them
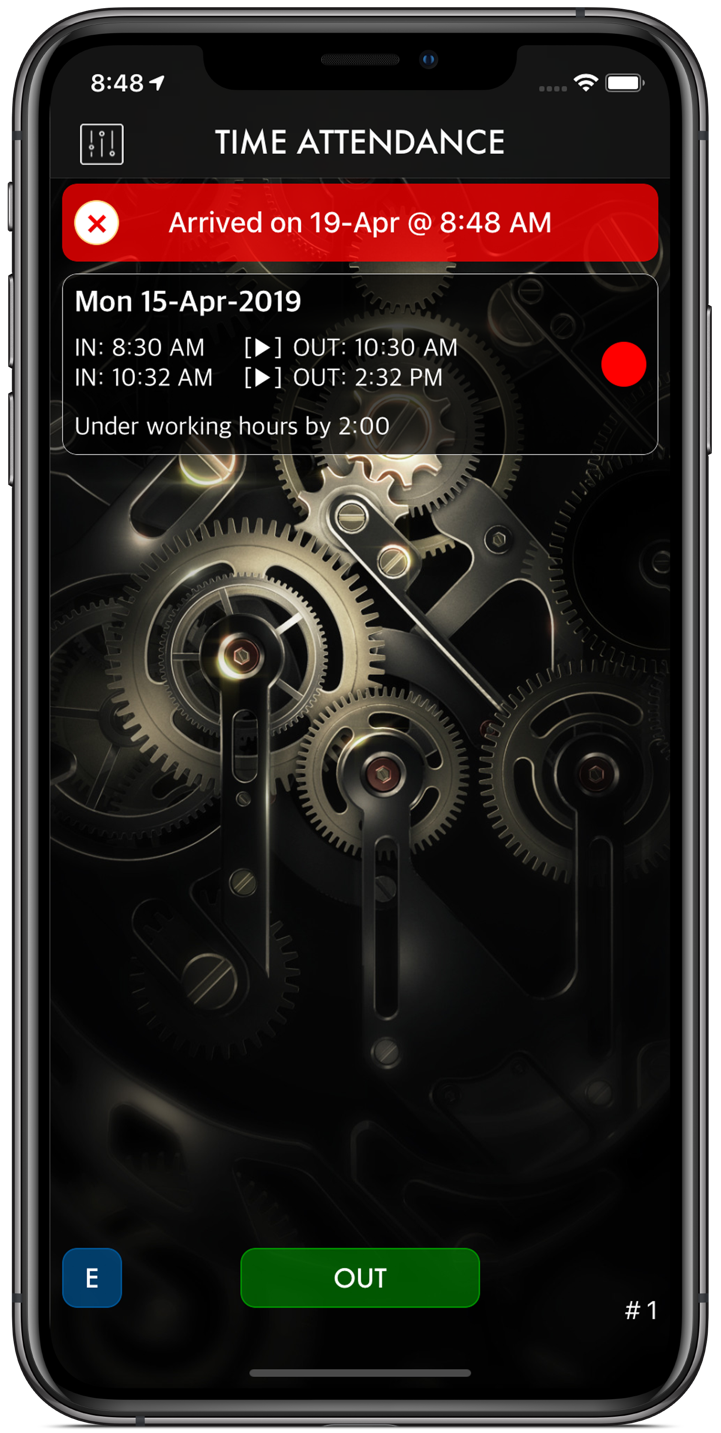
Back to the main page, you will see the registered time on the top of the page, where you can wait until the working hours over to finalize the record by signing out
After signing out in the same way of signing in, then the new record will be added to the main page.
The result of working hours will appear in the bottom of each day's record.
you can sign in and out as many times as necessary but within the working hours. For the purpose of the lunch break, personal leaves and so.

By pressing on any day's record, you will be taken to the day details view, where you can see all your log times within the same chosen day.
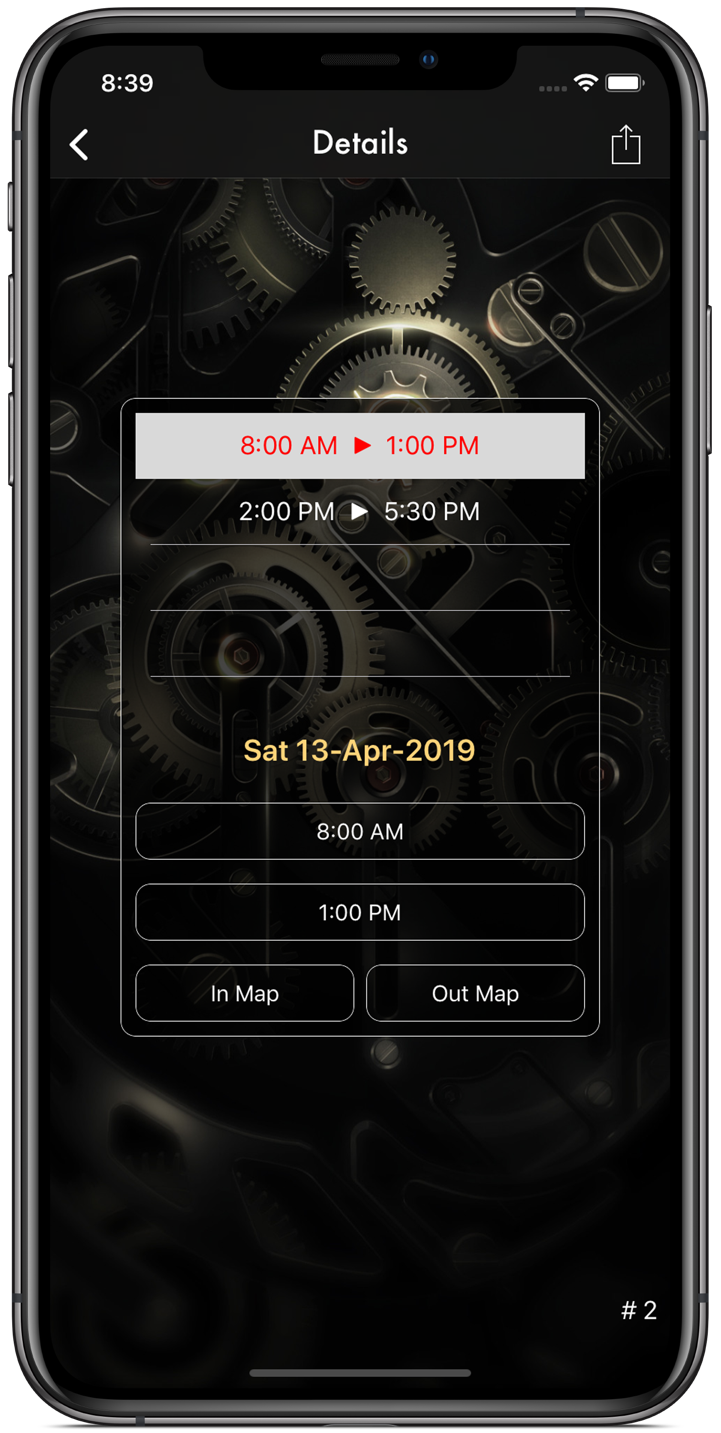
By selecting any record the buttons below will become active, where you can select them to modify times as needed.

You can delete a record by swiping it to the left and pressing (Delete).

By pressing on the (in map) or (out map) for any record you will be able to see on the location map where you have signed in or out.
You can turn this option On & Off from the Settings panel.

From the main page, you can view the result of the whole registered records, by pressing on the Evaluation button (E) in the lower left corner of the page, where an Action Sheet will popup with three lines of information:
- The first line shows if you have "EXTRA", "SHORTAGE" or you are just "ON TIME".
- The second line shows the duration in hours & minutes.
- The third line only appears if you have signed in during working hours and haven't signed out yet.
Below the three lines there are three buttons where you can export/print a useful (CSV), PDF or image files.

The third line will show one of the following statuses:
- Number of hours & minuets remaining to compensate time for the current day.
- If you have stayed after the "Post time" it reminds you that this time is uncountable.
- If you are already on time, it reminds you to leave the work right away.
- If you are over working hours it will provide you with the number of hours & minuets.
IMPORT RECORDS (CSV)
You can process and re-import the CSV file you've previously exported from the app, or you can create your own CSV file and fill it with data then loaded to the app.
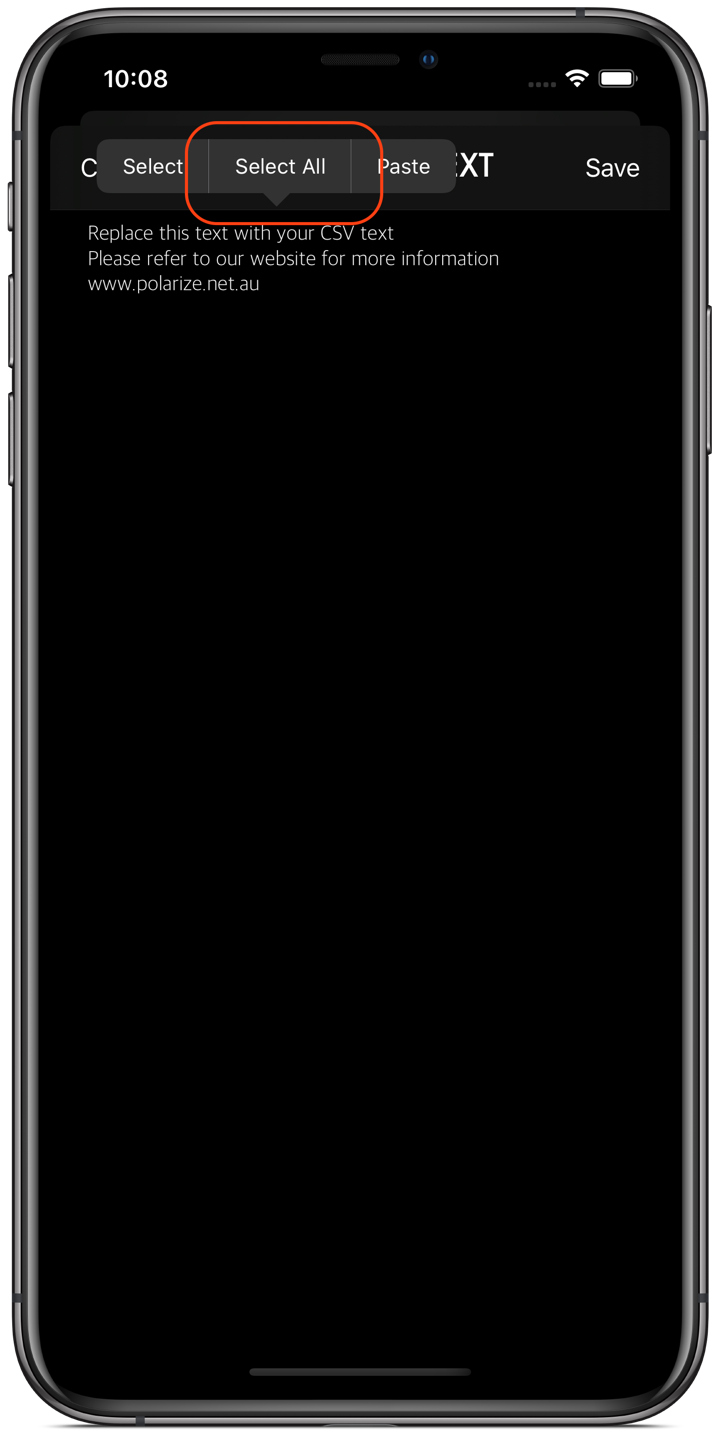
You have to erase the current "help" text from the text field.
The easiest way is the select all text then delete it.

- Prepare the CSV file on a computer or right from the App.
- Remove headers, and all extra lines, as shown in the illustration above.
- loaded the file so you can access it from your iOS device (i.e. iCloud drive, dropbox or google drive.)
- Open your desired cloud store from the "File" app.

Copy the whole CSV file.

and past it in the import view of the app.
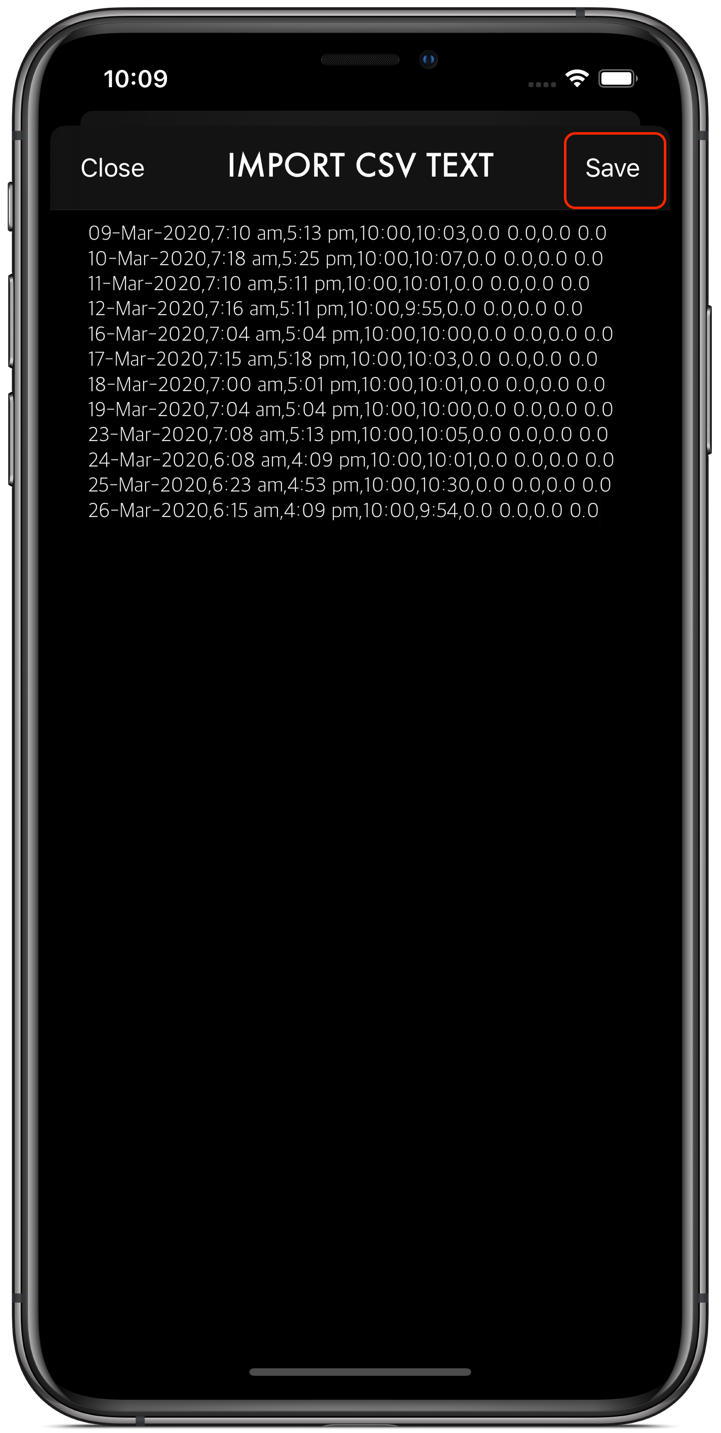
Review the records quickly and amend them as necessary (leave no extra gaps or empty lines).
Save, and your records should be in place.
This feature will not import the location coordinates for genuineness purposes, unless for special circumstances. Please contact us if you need so.
ERROR REPORT
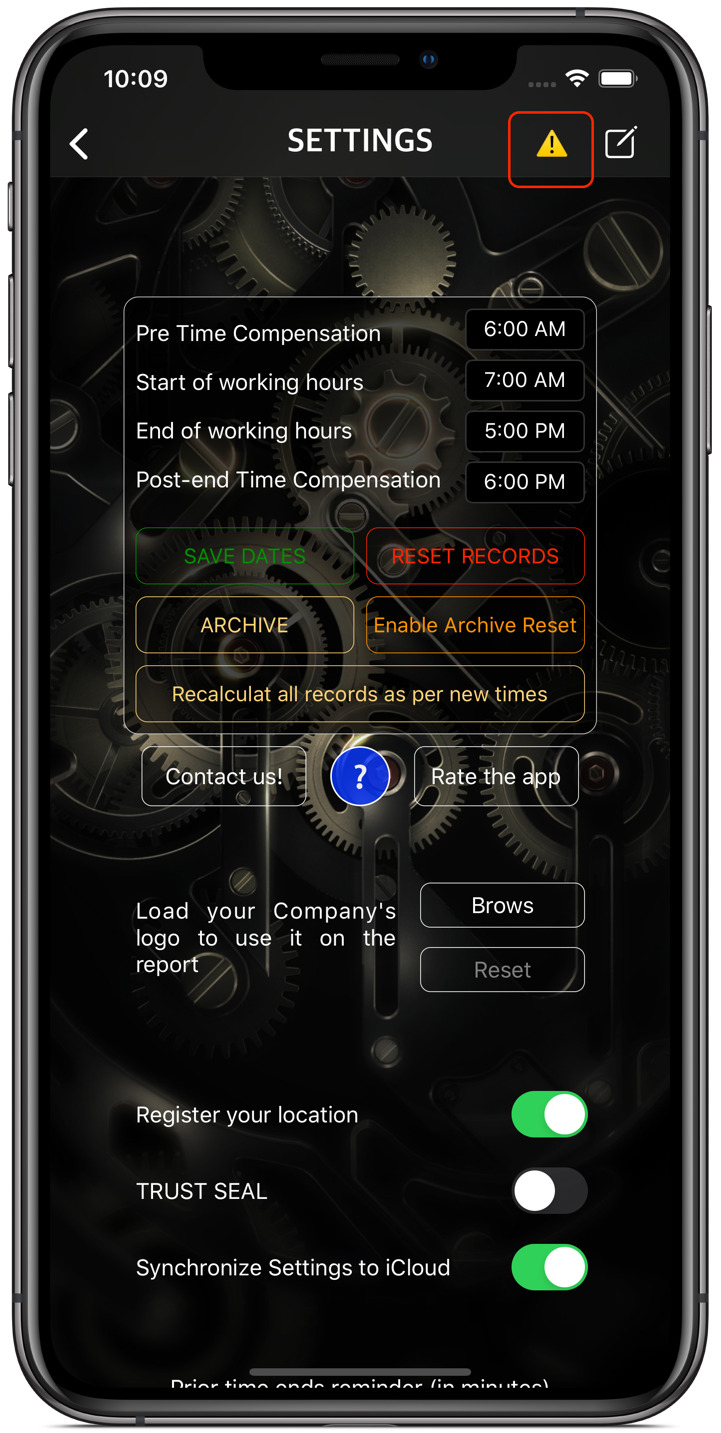
In case if you have faced any abnormal behaviour in the app, check if you can see this yellow button, in the SETTINGS pallet.
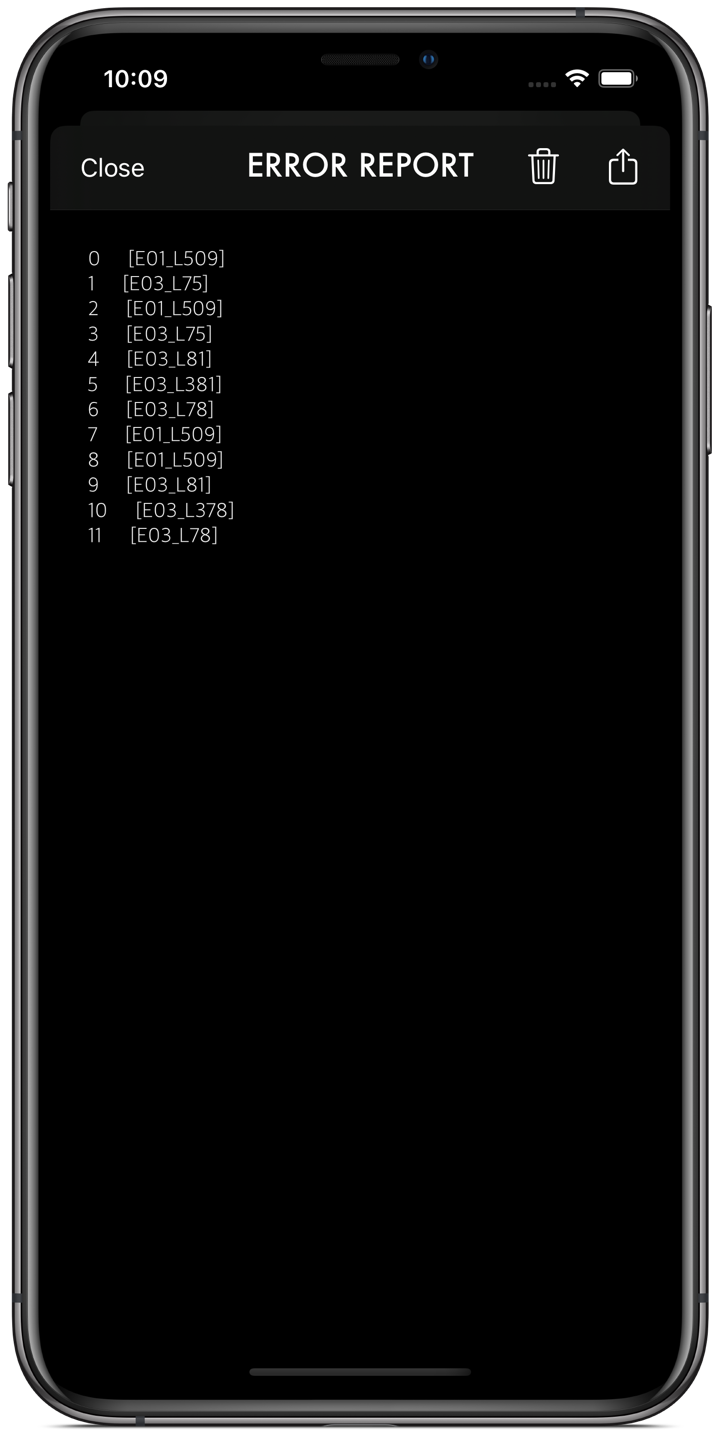
You can check if there is any comment for any problem, or you can share the report with us to solve any potential error.
ARCHIVE
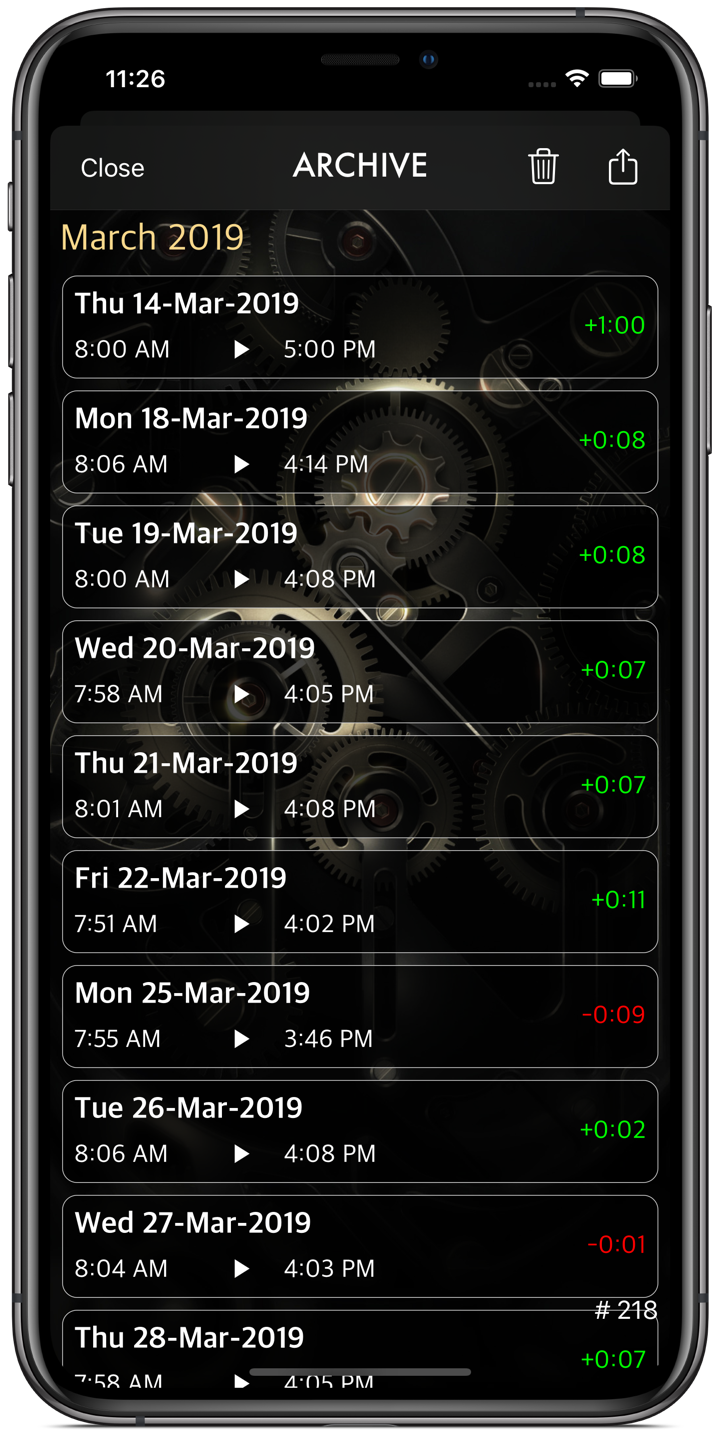
Archive your records instead of erasing them, for future reference.

Export / Print a (CSV), (PDF) or (Image) files.
TRUST MODE
By pressing the (TRUST) switch in the settings panel. the app will enter the TRUST mode which locks the ability to manually select "in" & "out" times.

You can differentiate between whether "TRUST" mode was on or off, from the brackets around the arrows for each record [►]

The detail view will show the "TRUSTED" records in green color.
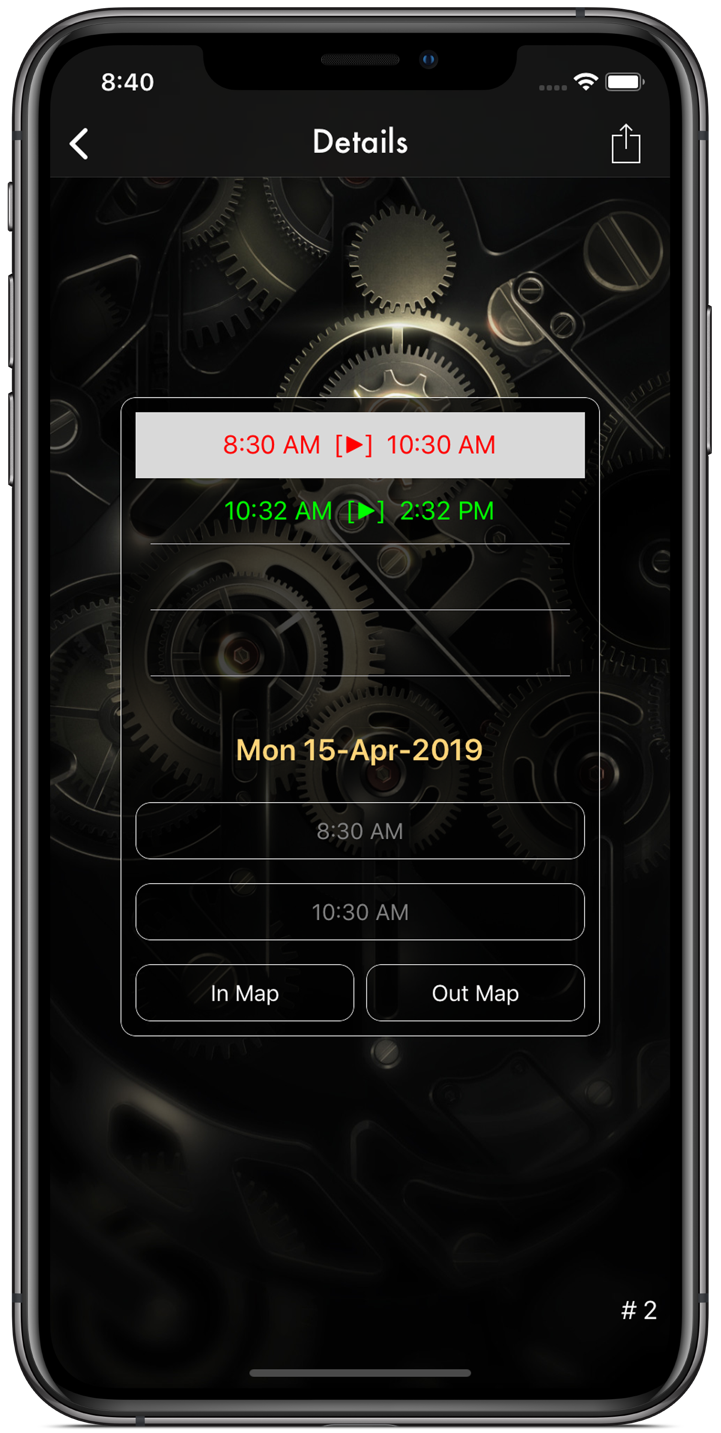
When a record is marked as "TRUSTED", you won't be able to modify the "in" & "out" times.
You can only view the registration location on the map.
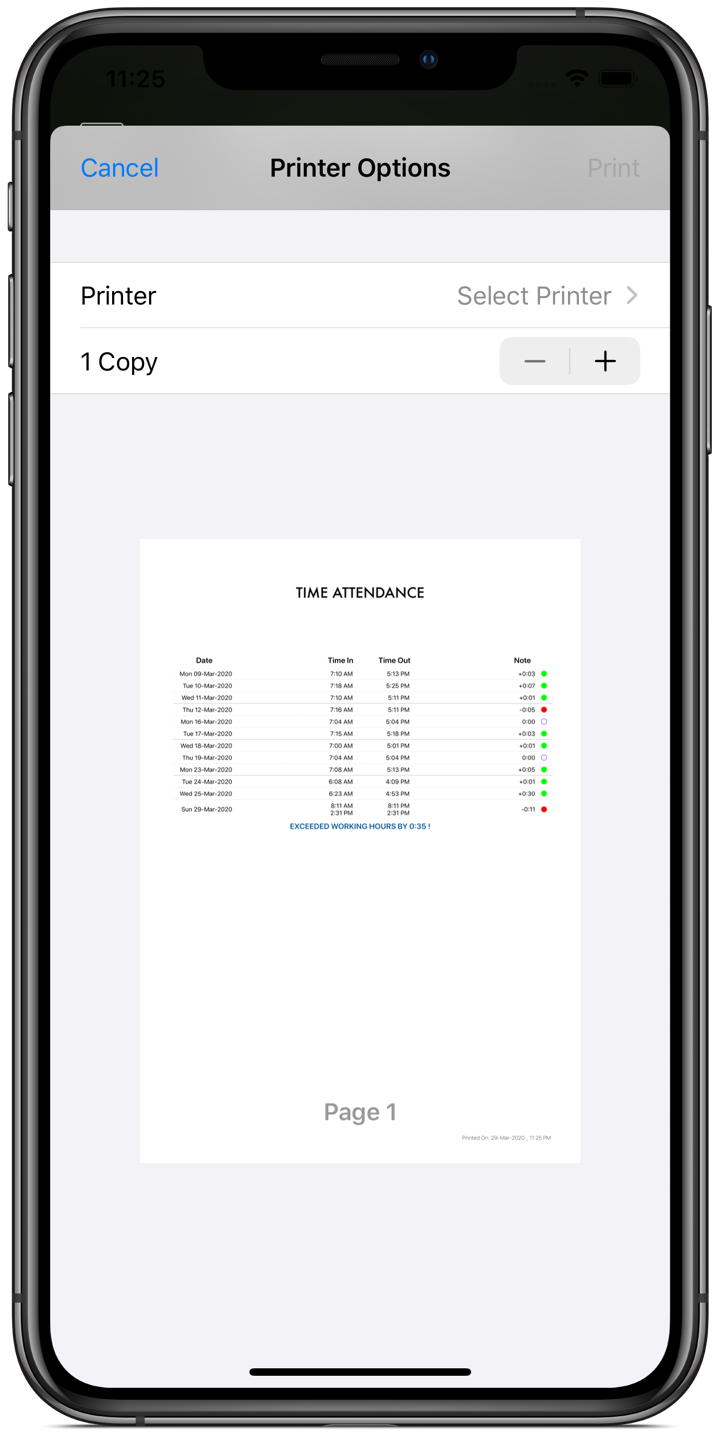
If you have at least one un TRUSTED record the (A4 size) report will appear as above.
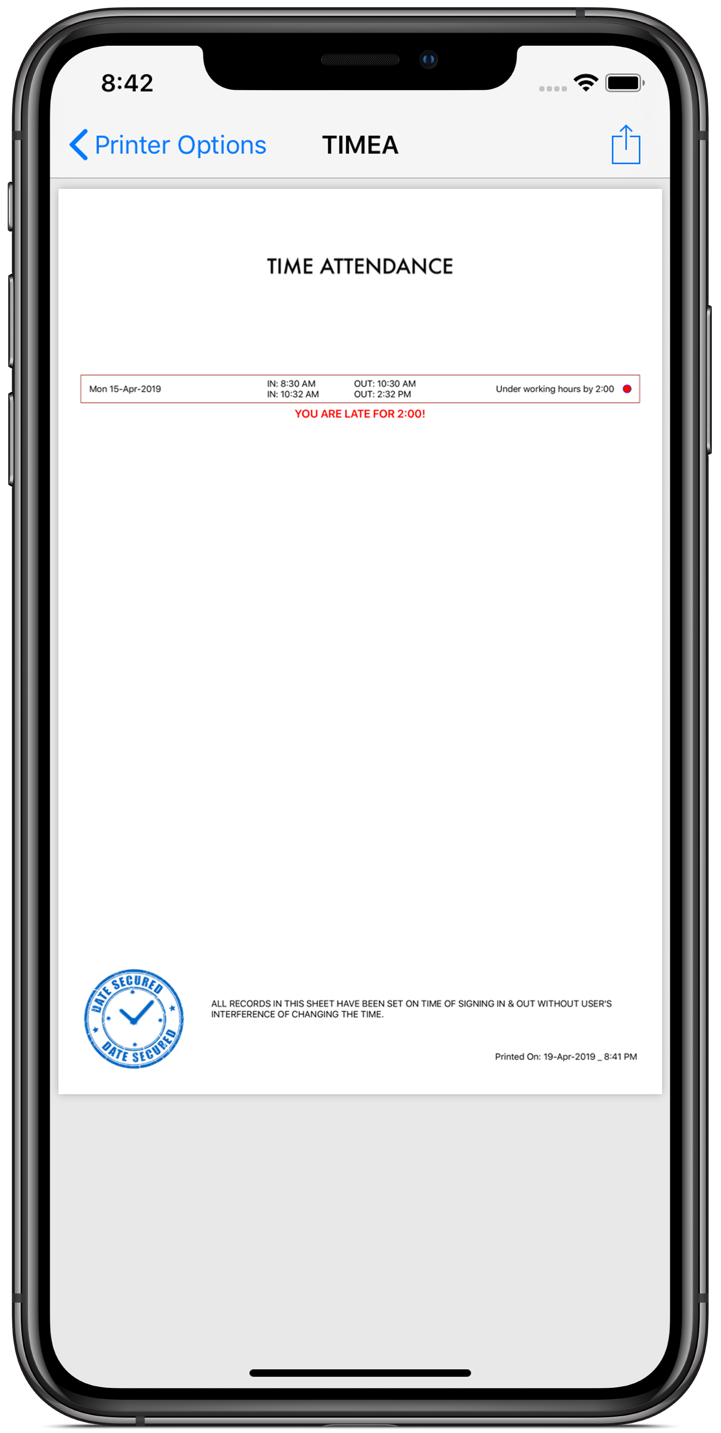
However, if all records where TRUSTED, a stamp and a note will appear on the bottom of the page to assure that all records where taken on real-time without the user's interference, to change the date or the time.
You can reset the records (Delete the whole records) from the Settings panel, to end a current working cycle and start a fresh one.
Depending on your Entity's policy, some companies have a weekly cycle and others have a monthly cycle.
ALERT & ERROR MESSAGES
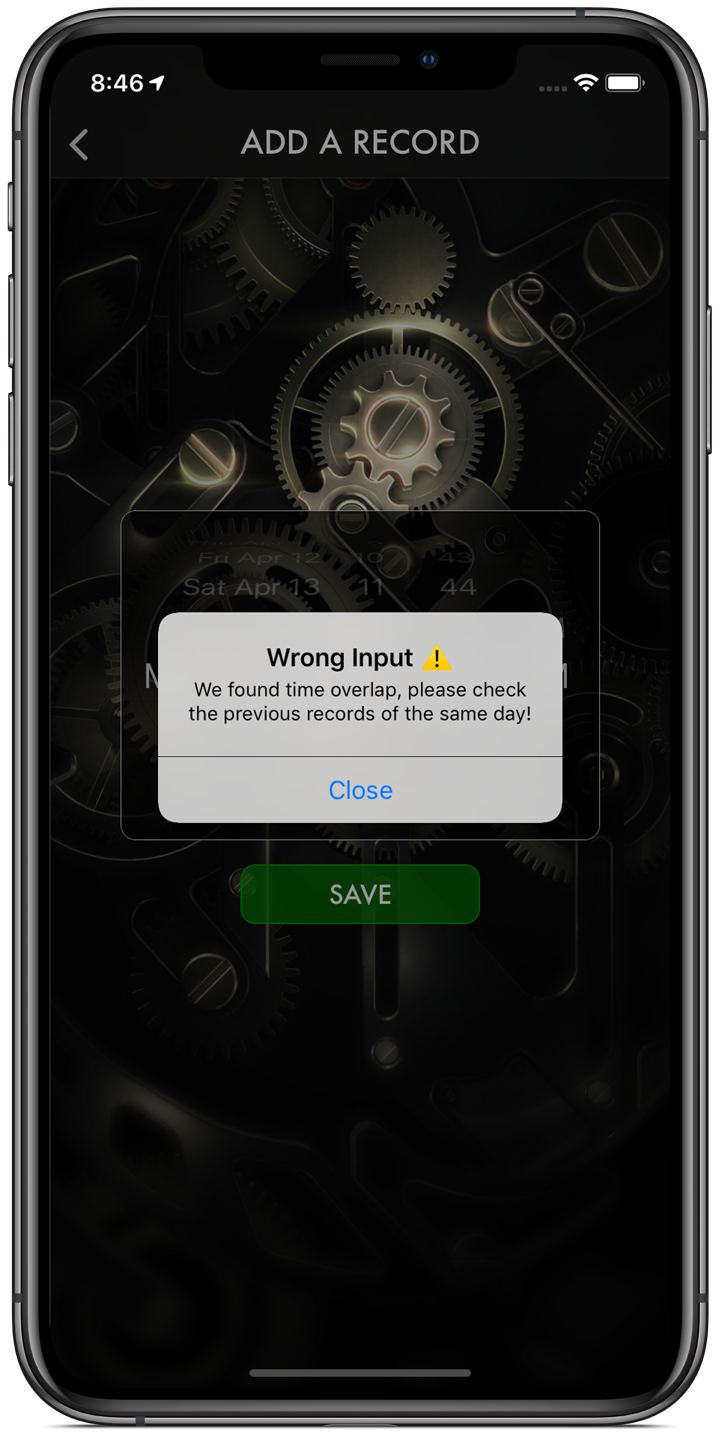
This message appears, when an Overlap discovered while attempting to add multiple records in the same day.
Please ensure to not overlap times. Although, there will be no problem if you are aiming to add a time period between two previously registered times. as if you want to add the a period of [1:00 > 2:00] between [8:00 > 11:00] and [3:00 > 4:00].

You cannot sign in on a day and sign out on another day, if you have stayed overnight at work then, you should sign out around 11:59 PM, then sign in again around 00:01 AM the next day and so on.
If you have a special working conditions, please contact us, we might help you in future updates of the app.

This will appear if you tried to sign in after the working hour ends. since the the time after post working hours is not countable ... like if you tried to sign in at 7:00 PM and your working hours end at 4:00 PM
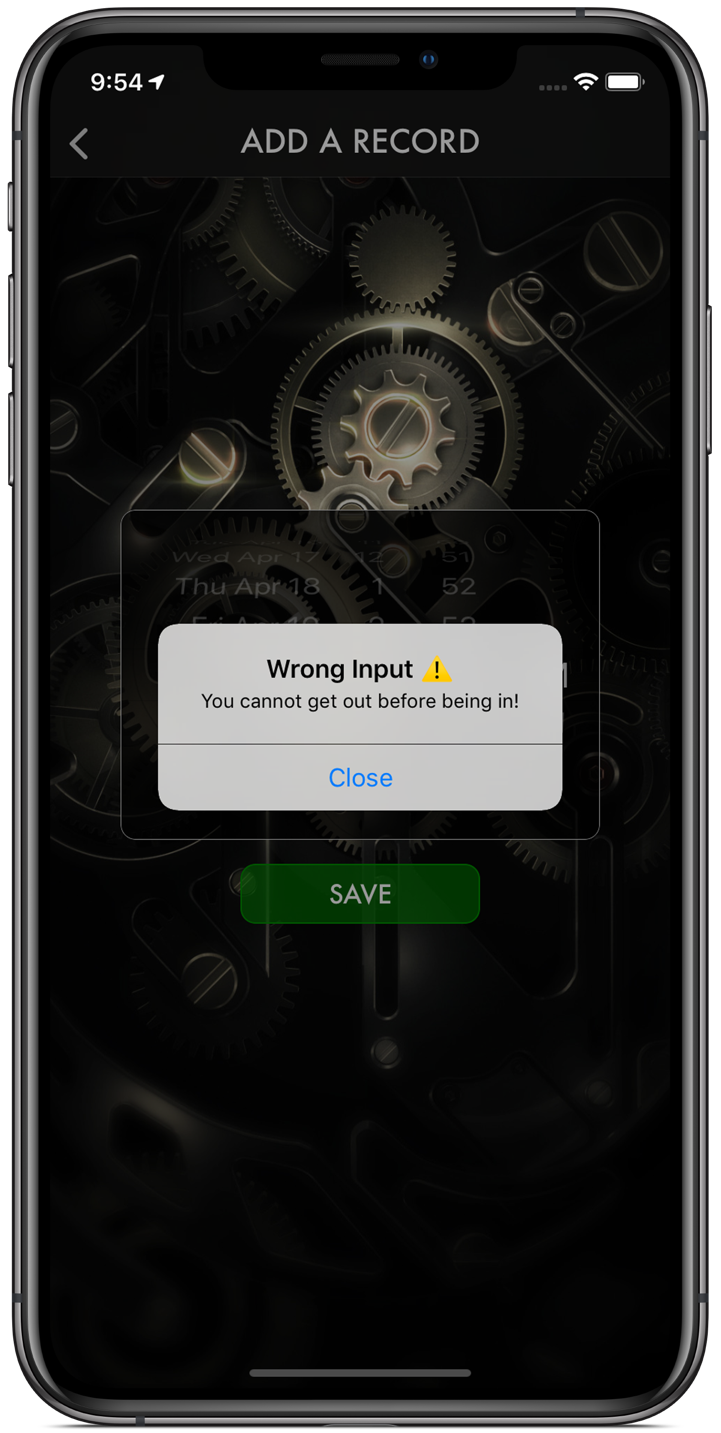
This will appear if you tried to sign out on a time that is before signing in ... like if tried to sign out at 6:00 AM and have signed in at 8:00 AM.
